连接到您的机器人#

Connecting to Your Robot

This tutorial walks you through connecting your robot to VEXcode IQ (1st gen) with a USB cable. By the end, you’ll have your Brain connected and ready to download projects to.

Note: The VEX IQ (1st gen) Brain connects to VEXcode over a wired USB connection only. The Radio Module is used to pair the Brain with a Controller, not to connect to VEXcode.

  1. Press the Check button on the Brain to turn it on.
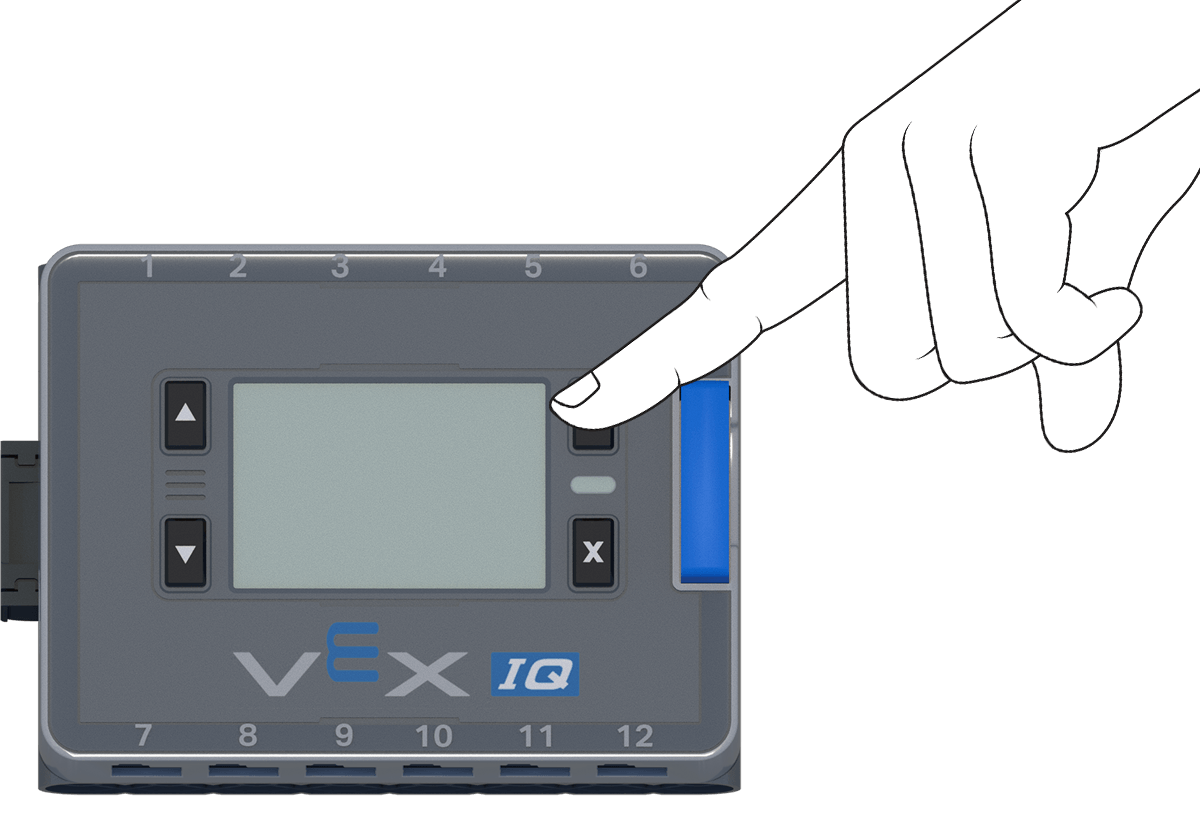
A finger pressing the Check button on the VEX IQ (1st gen) Brain.
  1. Connect your Brain to your computer with a USB Micro-B cable, then select the Connect button at the top-right of VEXcode.

Screenshot of the VEXcode IQ (1st gen) toolbar, with the Connect button highlighted.
  1. Select Connect next to USB under Wired Connection.
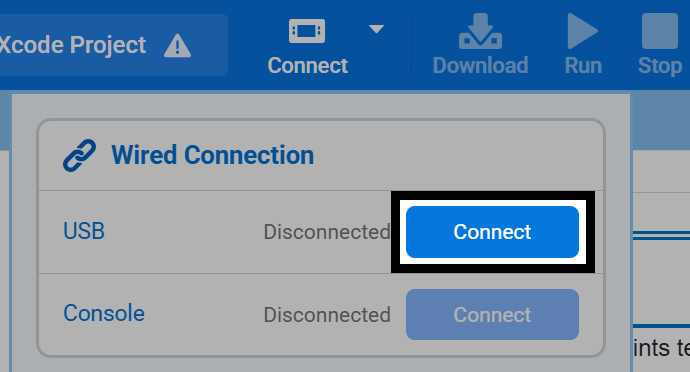
Screenshot of the Connect menu, showing the Wired Connection section, with the Connect button next to USB highlighted.
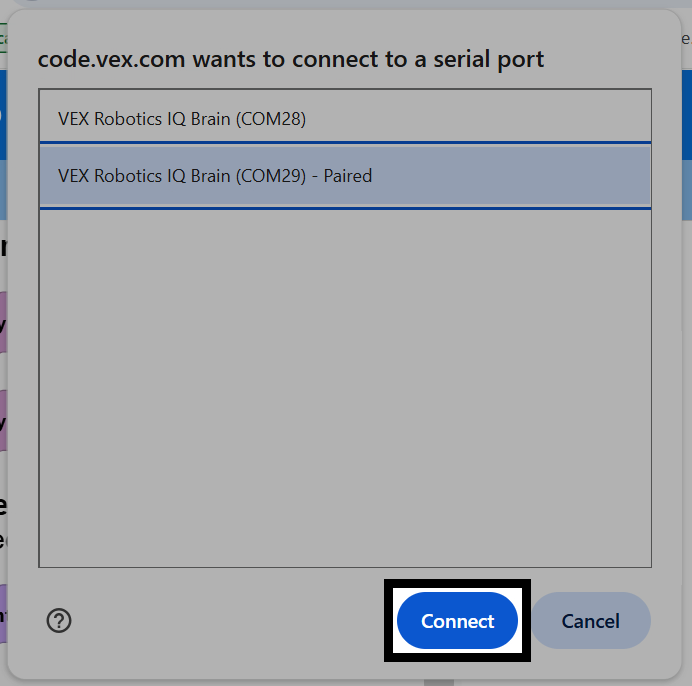
  1. Your browser will ask which serial port to connect to. On Windows, two VEX Robotics IQ Brain entries are listed. Select the one with the higher COM number.
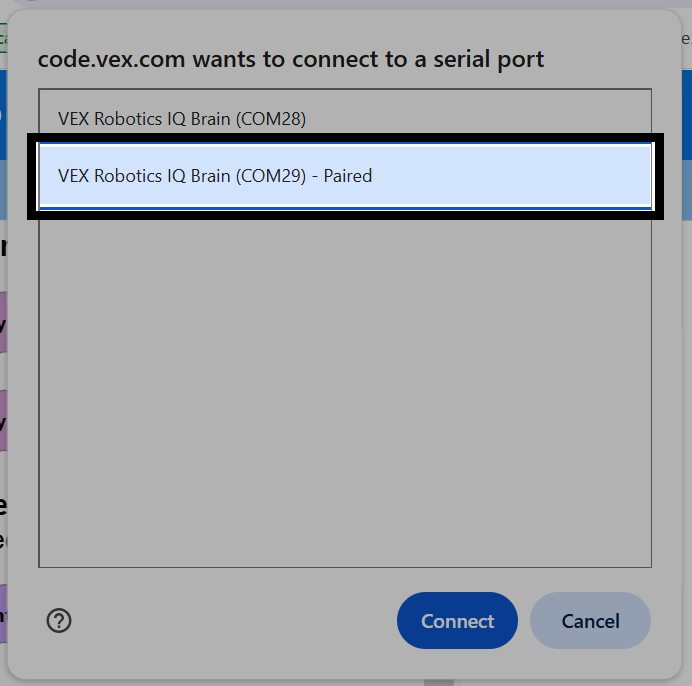
Screenshot of the serial port dialog on Windows, listing VEX Robotics IQ Brain (COM28) and VEX Robotics IQ Brain (COM29), with the higher-numbered COM29 entry selected and highlighted.

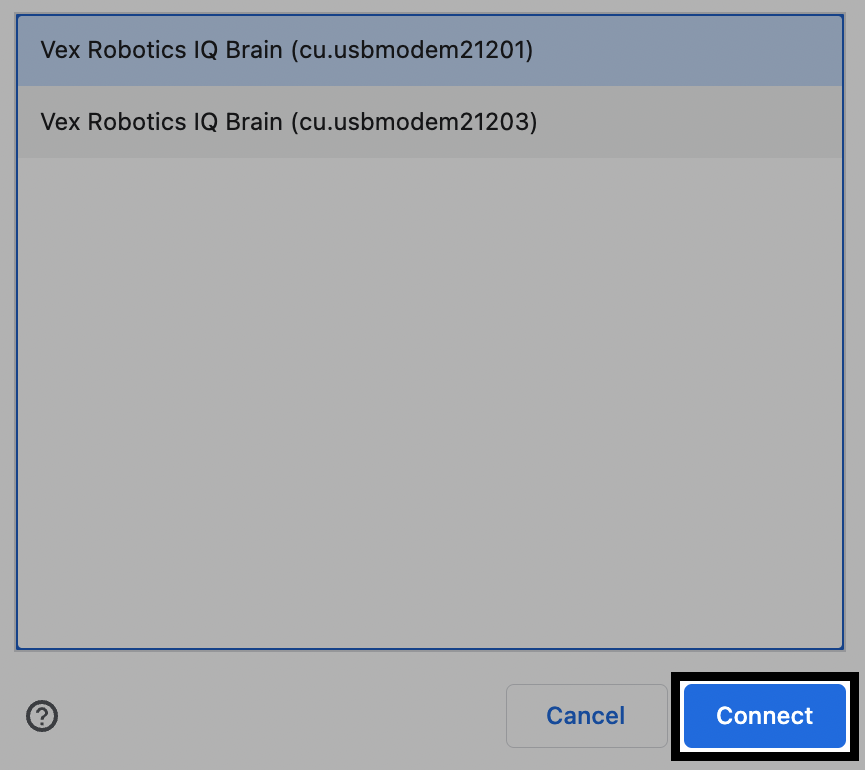
On macOS, select the lower-numbered VEX Robotics IQ Brain entry.
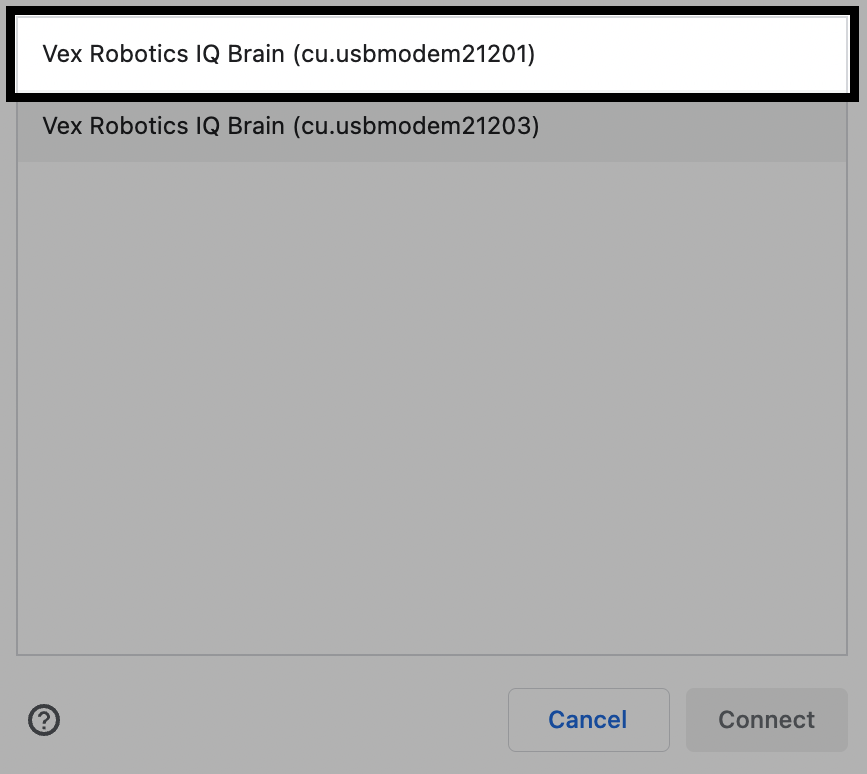
Screenshot of the serial port dialog on macOS, listing Vex Robotics IQ Brain (cu.usbmodem21201) and Vex Robotics IQ Brain (cu.usbmodem21203), with the lower-numbered 21201 entry highlighted.
  1. Select Connect.

Screenshot of the serial port dialog on Windows, with the VEX Robotics IQ Brain (COM29) entry selected and the Connect button highlighted. Screenshot of the serial port dialog on macOS, with the Vex Robotics IQ Brain (cu.usbmodem21201) entry selected and the Connect button highlighted.
  1. Once connected, USB will show as Connected, and the Brain section will appear, showing its Device Name, battery, and firmware version. The Brain icon in the toolbar will also turn green, and the Connect button will now read Connected.
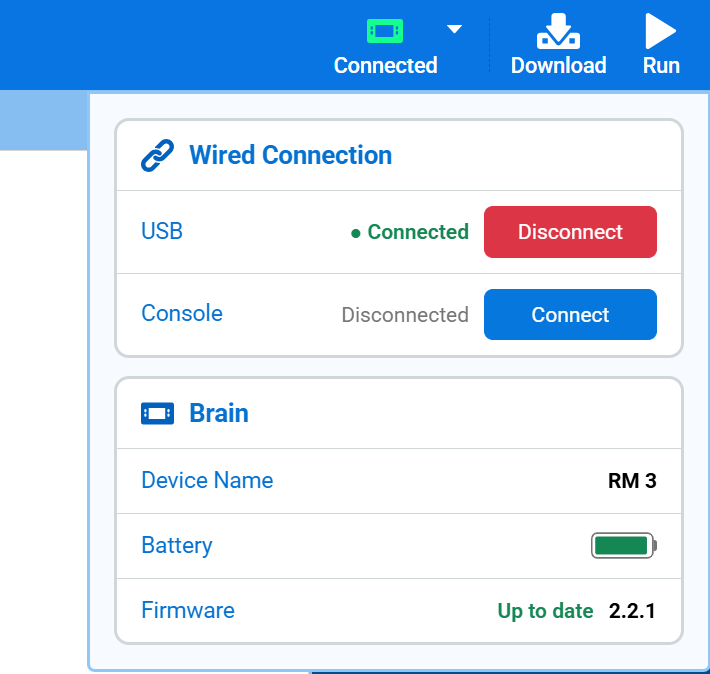
Screenshot of the Connect menu with USB shown as Connected, the Brain section showing its Device Name, battery, and firmware version, and the Brain icon in the toolbar shown in green.