• VEXcode Robotics Logo VEX Robotics Logo
  • VEX API Home Button VEX API Home Button
  • VEX 123 logo in purple VEX 123 logo in white
  • VEX GO logo in lime green VEX GO logo in white
  • VEXcode AIM logo in blue VEXcode AIM logo in white
  • VEX IQ logo in blue VEX IQ logo in white
  • VEX EXP logo in red VEX EXP logo in white
  • VEX V5 logo in red VEX V5 logo in white
  • VEX CTE logo in green VEX CTE logo in white
  • VEX AIR logo in orange VEX AIR logo in white
  • VEXcode VR logo in gold VEXcode VR logo in white
Skip to main content
Ctrl+K

< Back to Platform Select

  • VEX CTE
  • VEX CTE API Reference
  • VEXcode Tutorials
  • Navigating VEXcode
English
  • Español
  • 简体中文
  • Ελληνικά
  • VEXcode Robotics Logo

Section Navigation

  • Blocks
  • Python
  • VEXcode Tutorials
    • Navigating VEXcode
    • Setting Up the 6-Axis Arm
    • Connecting to the 6-Axis Arm
    • Moving and Removing Blocks
    • Moving the Arm
    • Changing the Arm’s Orientation
    • Starting and Stopping a Project
    • Using Loops
    • Using Examples
    • Using Help
    • Naming and Saving Your Project
    • Opening a Project
    • Updating Arm Firmware

Platform Navigation

  • VEX 123 logo in purple VEX 123 logo in white
  • VEX GO logo in lime green VEX GO logo in white
  • VEXcode AIM logo in blue VEXcode AIM logo in white
  • VEX IQ logo in blue VEX IQ logo in white
  • VEX EXP logo in red VEX EXP logo in white
  • VEX V5 logo in red VEX V5 logo in white
  • VEX CTE logo in green VEX CTE logo in white
  • VEX AIR logo in orange VEX AIR logo in white
  • VEXcode VR logo in gold VEXcode VR logo in white

Navigating VEXcode#

Navigating VEXcode

This tutorial covers the basics of the VEXcode CTE workspace, including the toolbar, run controls, tabs, and block categories. By the end, you’ll know what each part of the screen does.

The platform icon in the top-left shows the VEX platform your project is set up for.

Screenshot of the VEXcode CTE toolbar, showing the CTE platform icon in the top-left corner.

Select the globe icon to change the display language.

Screenshot of the VEXcode CTE toolbar, with the language switcher icon highlighted.

Select File to create a new project, open an existing or example project, save your project, or view VEXcode info such as the version number and privacy policy.

Screenshot of the VEXcode CTE toolbar, with the File button highlighted.

Select Tools to access keyboard shortcuts, reinstall the 6-Axis Arm’s firmware or set its name, change the Blockly color theme, get a link to the API Reference, or adjust VEXcode settings.

Screenshot of the VEXcode CTE toolbar, with the Tools button highlighted.

Select View to add tabs, reset your tab layout, or zoom in, out, or reset the zoom level in the toolbox.

Screenshot of the VEXcode CTE toolbar, with the View button highlighted.

Select Tutorials to open the tutorial list in the Help tab.

Screenshot of the VEXcode CTE toolbar, with the Tutorials button highlighted.

Select Builds to open the CTE build instructions on the VEX Robotics website.

Screenshot of the VEXcode CTE toolbar, with the Builds button highlighted.

Select Undo or Redo to step backward or forward through your recent changes.

Screenshot of the VEXcode CTE toolbar, with the Undo and Redo buttons highlighted.

Your project’s name is shown here. Select it to rename your project and save it to your computer. A warning icon appears if you have not saved your project and autosave is not available.

Screenshot of the VEXcode CTE toolbar, with the project name highlighted.

Select Connect to connect VEXcode to your 6-Axis Arm.

Screenshot of the VEXcode CTE toolbar, with the Connect button highlighted.

Select Start to run your project on the 6-Axis Arm, Step to run it one block at a time, or Stop to stop it.

Screenshot of the VEXcode CTE toolbar, with the Start, Step, and Stop buttons highlighted.

Select Share to download a PDF of your project to share, or Feedback to send feedback to VEX.

Screenshot of the VEXcode CTE toolbar, with the Share and Feedback buttons highlighted.

The Teach Pendant, Monitor, Help, and Console tabs appear here by default at the start of a project. Additional tabs can be added using the View menu.
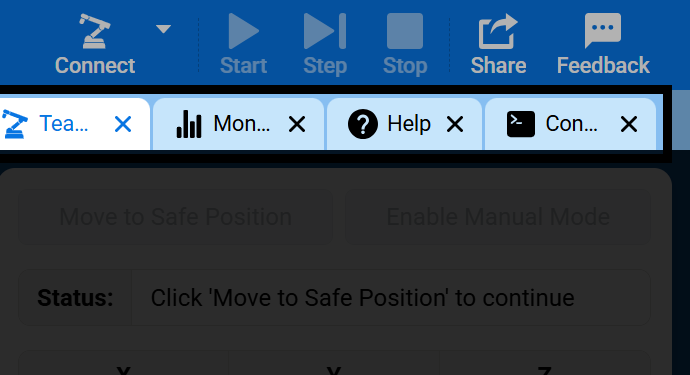
Screenshot of the VEXcode CTE window, with the Teach Pendant, Monitor, Help, and Console tabs highlighted.

The colored icons on the left side of the screen are the categories, helping you navigate through all the blocks you can use in the project. For example, selecting the Arm category shows its blocks, like move arm to position and move arm to orientation.
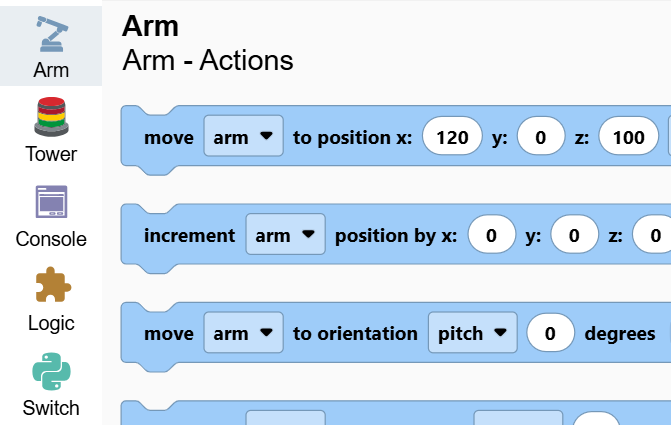
Screenshot of the VEXcode CTE window, showing the category icons on the left side of the screen, with the Arm category selected.

Selecting a category scrolls the toolbox to that section, so you can drag its blocks into your project.
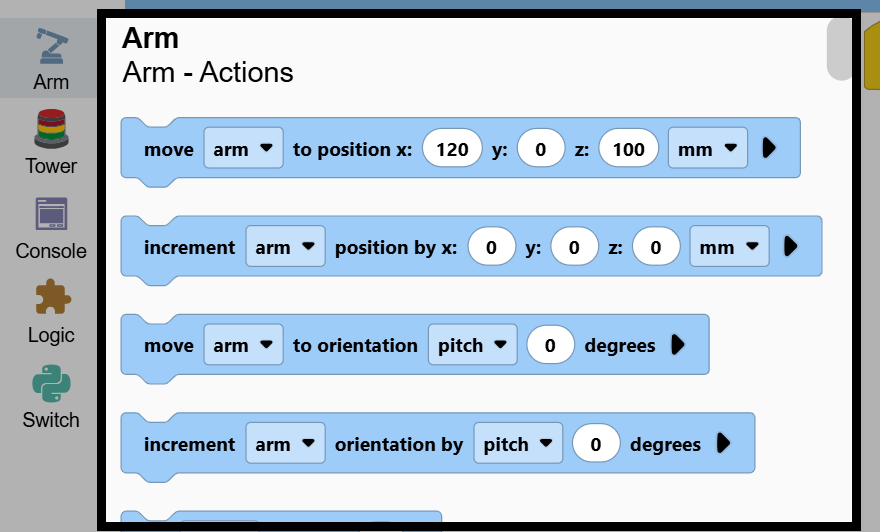
Screenshot of the VEXcode CTE window, with the toolbox highlighted, showing the Arm category's blocks.

The rest of the screen is your workspace, where you build your project by connecting blocks together.
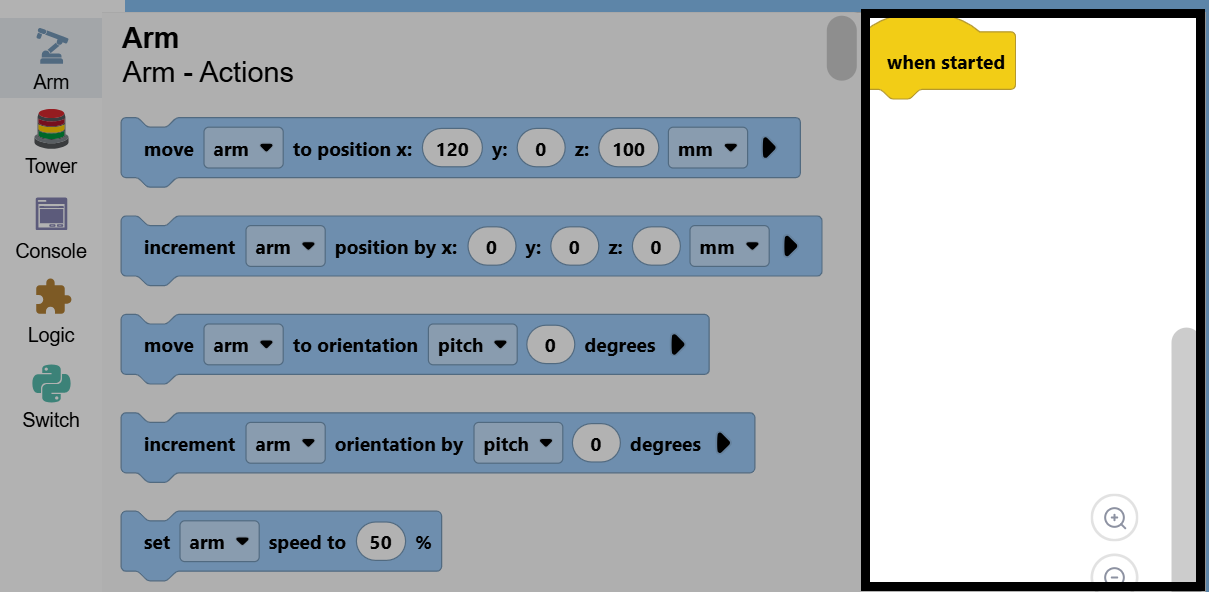
Screenshot of the VEXcode CTE window, with the workspace highlighted, showing a when started block, and the toolbox dimmed on the left.

previous

VEXcode Tutorials

next

Setting Up the 6-Axis Arm

Innovation First, International

VEX and VEX Robotics are trademarks or service marks of Innovation First, Inc. Copyright ©2026. All Rights Reserved. VEX Robotics, Inc. is a subsidiary of Innovation First International, Inc. All other product names / marks of others are the property of their respective owners. Patents and / or Patents Pending - innovationfirst.com/patents
Site Privacy Policy / Site Terms of Use / Cookie Policy / Software Privacy Policy

Visit the VEX Robotics Facebook Page Visit the VEX Robotics Twitter Page Visit the VEX Robotics Instagram Page Visit the VEX Robotics YouTube Page
VEX API Feedback Form

We value your feedback! Use this form to share suggestions, compliments, or report errors with the VEX API. Your input helps us enhance the VEX API documentation.

If you are experiencing technical issues or require customer support, please visit support.vex.com.

  • Send Happy Feedback
  • Send Sad Feedback

Note: the current URL will be shared with your message

By including your email address, you agree that VEX may send you email emails if we have questions about your feedback.
Privacy Policy >
Please provide your feedback. Feedback submitted successfully!
Choose Which VEX IQ Generation to View

VEX IQ (1st gen)

VEX IQ (2nd gen)