
Starting and Stopping a Project#
This tutorial walks you through starting, stepping through, and stopping a project in VEXcode CTE. By the end, you’ll have run your project on the 6-Axis Arm and stopped it.
Projects run on the 6-Axis Arm directly from VEXcode, so the arm needs to stay connected while the project runs.
Build a project in the workspace.
Make sure your arm is connected to VEXcode.
Select Start to have the arm begin running the project.

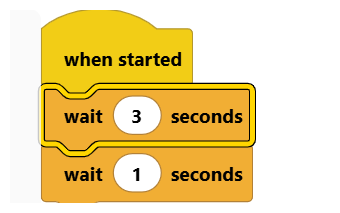
Select Step to run the project one block at a time. This is helpful for checking what each block does.

The project starts paused, with the next block to run outlined in yellow. Each time you select Step, that block runs and is outlined in green while it runs. When it finishes, the project pauses again on the next block. Select Start at any time to continue running the rest of the project normally.
Select Stop to stop the project. A project keeps running until you select Stop, even after its last block finishes.
