• VEXcode Robotics Logo VEX Robotics Logo
  • VEX API Home Button VEX API Home Button
  • VEX 123 logo in purple VEX 123 logo in white
  • VEX GO logo in lime green VEX GO logo in white
  • VEXcode AIM logo in blue VEXcode AIM logo in white
  • VEX IQ logo in blue VEX IQ logo in white
  • VEX EXP logo in red VEX EXP logo in white
  • VEX V5 logo in red VEX V5 logo in white
  • VEX CTE logo in green VEX CTE logo in white
  • VEX AIR logo in orange VEX AIR logo in white
  • VEXcode VR logo in gold VEXcode VR logo in white
Saltar al contenido principal
Ctrl+K

< Back to Platform Select

  • VEX IQ (2nd gen)
  • Referencia de la API de VEX IQ (2.ª generación)
  • Tutoriales de VEXcode
  • Navegando por VEXcode
Spanish
  • English
  • 简体中文
  • VEXcode Robotics Logo

Navegación de la sección

  • Bloques
  • Python
  • C++
  • Tutoriales de VEXcode
    • Navegando por VEXcode
    • Conectando tu robot
    • Configuring a Drivetrain
    • Configuring a Motor
    • Configuring Devices
    • Configuring a Controller
    • Traslado y remoción de bloques
    • Moving Your Robot
    • Turning Your Robot
    • Abriendo la garra
    • Mover el brazo
    • Descarga e inicio de un proyecto
    • Uso de bucles
    • Si entonces Bloques
    • Mis bloques
    • Almacenamiento de datos
    • Uso de eventos
    • Cómo nombrar y guardar tu proyecto
    • Apertura de un proyecto
    • Actualización del firmware del cerebro
    • Uso de ejemplos y plantillas
    • Utilizar la ayuda

Navegación de la plataforma

  • VEX 123 logo in purple VEX 123 logo in white
  • VEX GO logo in lime green VEX GO logo in white
  • VEXcode AIM logo in blue VEXcode AIM logo in white
  • VEX IQ logo in blue VEX IQ logo in white
  • VEX EXP logo in red VEX EXP logo in white
  • VEX V5 logo in red VEX V5 logo in white
  • VEX CTE logo in green VEX CTE logo in white
  • VEX AIR logo in orange VEX AIR logo in white
  • VEXcode VR logo in gold VEXcode VR logo in white

Navegando por VEXcode#

Navigating VEXcode

This tutorial covers the basics of the VEXcode IQ (2nd gen) workspace, including the toolbar, run controls, tabs, and block categories. By the end, you’ll know what each part of the screen does.

The platform icon in the top-left shows the VEX platform your project is set up for.

Screenshot of the VEXcode toolbar, with the IQ 2nd gen platform icon highlighted.

Select the globe icon to change the display language.

Screenshot of the VEXcode toolbar, with the language switcher icon highlighted.

Select File to create a new project, open an existing or example project, save your project, or view VEXcode info such as the version number and privacy policy.

Screenshot of the VEXcode toolbar, with the File menu highlighted.

Select Tools to access keyboard shortcuts, install firmware, download drivers, change the Blockly color theme, get a link to the API Reference, or adjust VEXcode settings.

Screenshot of the VEXcode toolbar, with the Tools menu highlighted.

Select View to add tabs, reset your tab layout, or zoom in, out, or reset the zoom level in the toolbox.

Screenshot of the VEXcode toolbar, with the View menu highlighted.

Select Tutorials to open the tutorial list in the Help tab.

Screenshot of the VEXcode toolbar, with the Tutorials button highlighted.

Select Builds to choose a pre-made robot build, such as Flop, Huey, or Clawbot.

Screenshot of the VEXcode toolbar, with the Builds button highlighted.

Select Undo or Redo to step backward or forward through your recent changes.

Screenshot of the VEXcode toolbar, with the Undo and Redo buttons highlighted.

Select the Slot number to choose which of the Brain’s project slots to save to.

Screenshot of the VEXcode toolbar, with the Slot selector highlighted.

Your project’s name is shown here. Select it to rename your project and save it to your computer.

Screenshot of the VEXcode toolbar, with the project name highlighted.

Select Connect to connect VEXcode to your Brain.

Screenshot of the VEXcode toolbar, with the Connect button highlighted.

Select Download to send your project to the Brain, Run to run it, or Stop to stop it.

Screenshot of the VEXcode toolbar, with the Download, Run, and Stop buttons highlighted.

Select Share to download a PDF of your project to share, or Feedback to send feedback to VEX.

Screenshot of the VEXcode toolbar, with the Share and Feedback buttons highlighted.

The Devices and Help tabs appear here by default at the start of a project. Additional tabs can be added using the View menu.
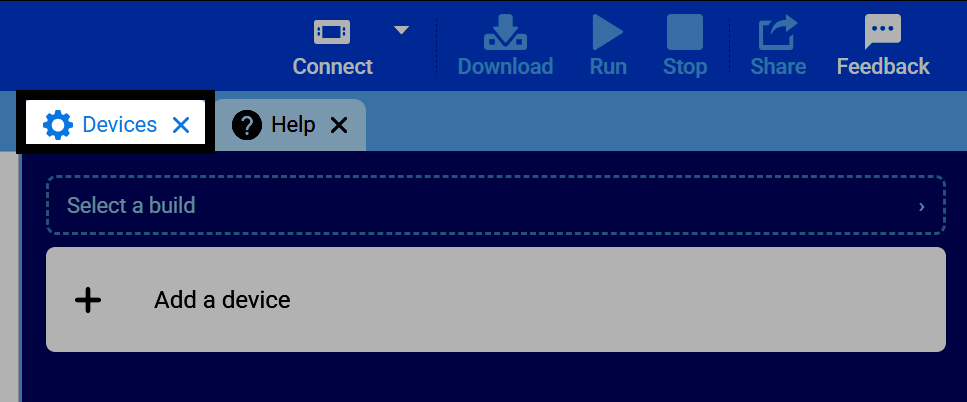
Screenshot of VEXcode with the Devices and Help tabs highlighted.

The colored icons on the left side of the screen are the categories, helping you navigate through all the blocks you can use in the project. As you add devices to the project, more categories will appear here.
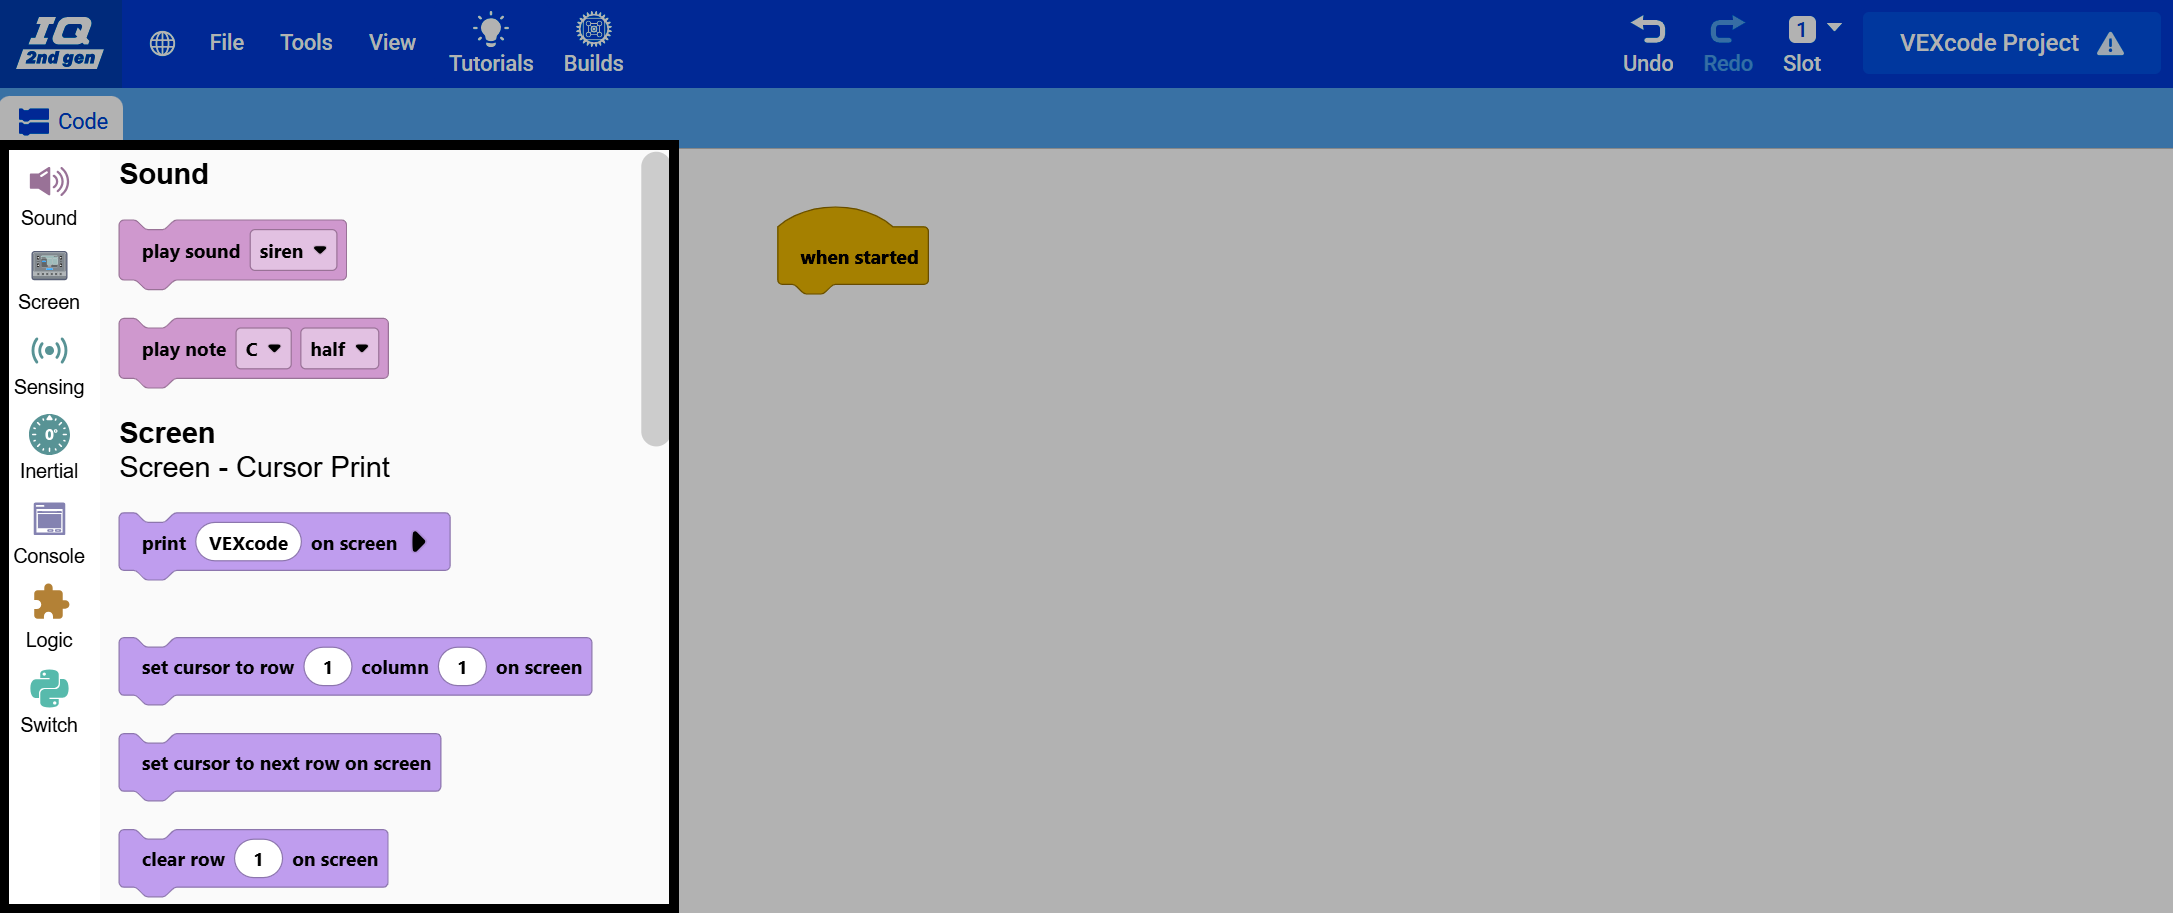
Captura de pantalla de la ventana de VEXcode IQ (2.ª generación) con las categorías de bloques resaltadas en el lado izquierdo de la pantalla y el espacio de trabajo atenuado.

Selecting a category shows you all the blocks in that category, in the toolbox next to it, ready to drag into your project.
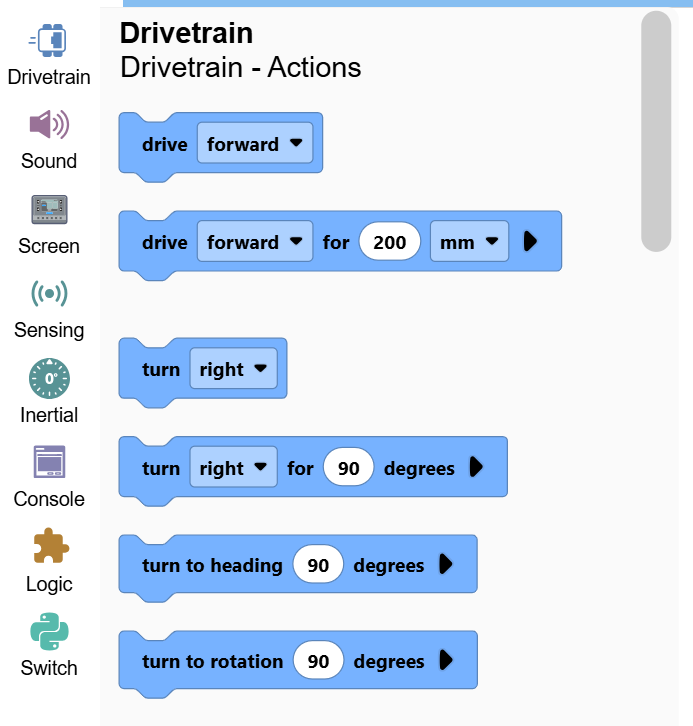
Screenshot of the VEXcode IQ (2nd gen) window, with the toolbox highlighted, showing the Drivetrain category's blocks.

anterior

Tutoriales de VEXcode

siguiente

Conectando tu robot

Innovation First, International

VEX y VEX Robotics son marcas comerciales o marcas de servicio de Innovation First, Inc. Copyright ©2026. Todos los derechos reservados. VEX Robotics, Inc. es una subsidiaria de Innovation First International, Inc. Todos los demás nombres/marcas de productos de terceros son propiedad de sus respectivos dueños. Patentes y/o Patentes en trámite - innovationfirst.com/patents
Política de privacidad del sitio / Términos de uso del sitio / Política de cookies / Política de privacidad del software

Visita la página de Facebook de VEX Robotics Visita la página de Twitter de VEX Robotics Visita la página de Instagram de VEX Robotics Visita la página de YouTube de VEX Robotics
Formulario de comentarios de la API de VEX

¡Valoramos tus comentarios! Usa este formulario para compartir sugerencias, felicitaciones o informar errores con la API de VEX. Tus comentarios nos ayudan a mejorar la documentación de la API de VEX.

Si tiene problemas técnicos o necesita asistencia al cliente, visite support.vex.com.

  • Send Happy Feedback
  • Send Sad Feedback

Nota: la URL actual se compartirá con tu mensaje.

Al incluir su dirección de correo electrónico, usted acepta que VEX puede enviarle correos electrónicos si tenemos preguntas sobre sus comentarios.
Política de privacidad >
Por favor, envíenos sus comentarios. ¡Comentarios enviados exitosamente!
Choose Which VEX IQ Generation to View

VEX IQ (1st gen)

VEX IQ (2nd gen)