• VEXcode Robotics Logo VEX Robotics Logo
  • VEX API Home Button VEX API Home Button
  • VEX 123 logo in purple VEX 123 logo in white
  • VEX GO logo in lime green VEX GO logo in white
  • VEXcode AIM logo in blue VEXcode AIM logo in white
  • VEX IQ logo in blue VEX IQ logo in white
  • VEX EXP logo in red VEX EXP logo in white
  • VEX V5 logo in red VEX V5 logo in white
  • VEX CTE logo in green VEX CTE logo in white
  • VEX AIR logo in orange VEX AIR logo in white
  • VEXcode VR logo in gold VEXcode VR logo in white
跳至主要内容
Ctrl+K

< Back to Platform Select

  • VEX IQ (2nd gen)
  • VEX IQ(第二代)API 参考
  • VEXcode教程
  • VEXcode导航
简体中文
  • English
  • Spanish
  • VEXcode Robotics Logo

版块导航

  • 区块
  • Python
  • C++
  • VEXcode教程
    • VEXcode导航
    • 连接到您的机器人
    • Configuring a Drivetrain
    • Configuring a Motor
    • Configuring Devices
    • Configuring a Controller
    • 移动和移除方块
    • Moving Your Robot
    • Turning Your Robot
    • 打开爪子
    • 移动手臂
    • 下载并启动项目
    • 使用循环
    • 如果则阻塞
    • 我的积木
    • 数据存储
    • 使用事件
    • 项目命名和保存
    • 启动项目
    • 更新大脑固件
    • 使用示例和模板
    • 使用帮助

平台导航

  • VEX 123 logo in purple VEX 123 logo in white
  • VEX GO logo in lime green VEX GO logo in white
  • VEXcode AIM logo in blue VEXcode AIM logo in white
  • VEX IQ logo in blue VEX IQ logo in white
  • VEX EXP logo in red VEX EXP logo in white
  • VEX V5 logo in red VEX V5 logo in white
  • VEX CTE logo in green VEX CTE logo in white
  • VEX AIR logo in orange VEX AIR logo in white
  • VEXcode VR logo in gold VEXcode VR logo in white

VEXcode导航#

Navigating VEXcode

This tutorial covers the basics of the VEXcode IQ (2nd gen) workspace, including the toolbar, run controls, tabs, and block categories. By the end, you’ll know what each part of the screen does.

The platform icon in the top-left shows the VEX platform your project is set up for.

Screenshot of the VEXcode toolbar, with the IQ 2nd gen platform icon highlighted.

Select the globe icon to change the display language.

Screenshot of the VEXcode toolbar, with the language switcher icon highlighted.

Select File to create a new project, open an existing or example project, save your project, or view VEXcode info such as the version number and privacy policy.

Screenshot of the VEXcode toolbar, with the File menu highlighted.

Select Tools to access keyboard shortcuts, install firmware, download drivers, change the Blockly color theme, get a link to the API Reference, or adjust VEXcode settings.

Screenshot of the VEXcode toolbar, with the Tools menu highlighted.

Select View to add tabs, reset your tab layout, or zoom in, out, or reset the zoom level in the toolbox.

Screenshot of the VEXcode toolbar, with the View menu highlighted.

Select Tutorials to open the tutorial list in the Help tab.

Screenshot of the VEXcode toolbar, with the Tutorials button highlighted.

Select Builds to choose a pre-made robot build, such as Flop, Huey, or Clawbot.

Screenshot of the VEXcode toolbar, with the Builds button highlighted.

Select Undo or Redo to step backward or forward through your recent changes.

Screenshot of the VEXcode toolbar, with the Undo and Redo buttons highlighted.

Select the Slot number to choose which of the Brain’s project slots to save to.

Screenshot of the VEXcode toolbar, with the Slot selector highlighted.

Your project’s name is shown here. Select it to rename your project and save it to your computer.

Screenshot of the VEXcode toolbar, with the project name highlighted.

Select Connect to connect VEXcode to your Brain.

Screenshot of the VEXcode toolbar, with the Connect button highlighted.

Select Download to send your project to the Brain, Run to run it, or Stop to stop it.

Screenshot of the VEXcode toolbar, with the Download, Run, and Stop buttons highlighted.

Select Share to download a PDF of your project to share, or Feedback to send feedback to VEX.

Screenshot of the VEXcode toolbar, with the Share and Feedback buttons highlighted.

The Devices and Help tabs appear here by default at the start of a project. Additional tabs can be added using the View menu.
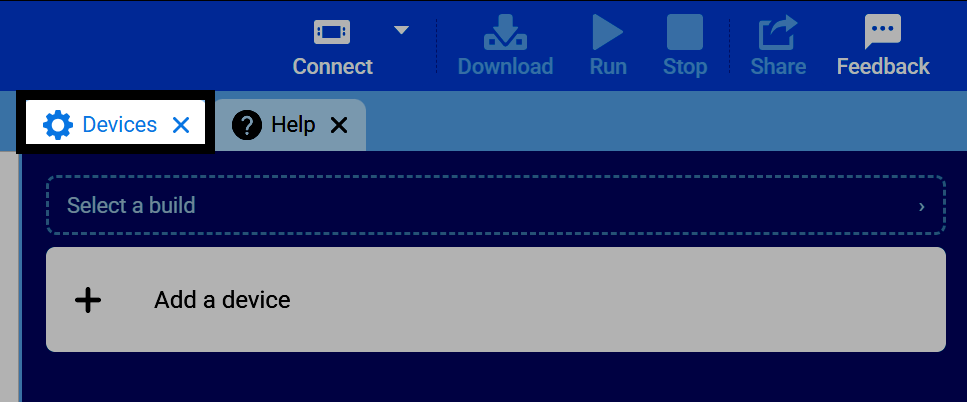
Screenshot of VEXcode with the Devices and Help tabs highlighted.

The colored icons on the left side of the screen are the categories, helping you navigate through all the blocks you can use in the project. As you add devices to the project, more categories will appear here.
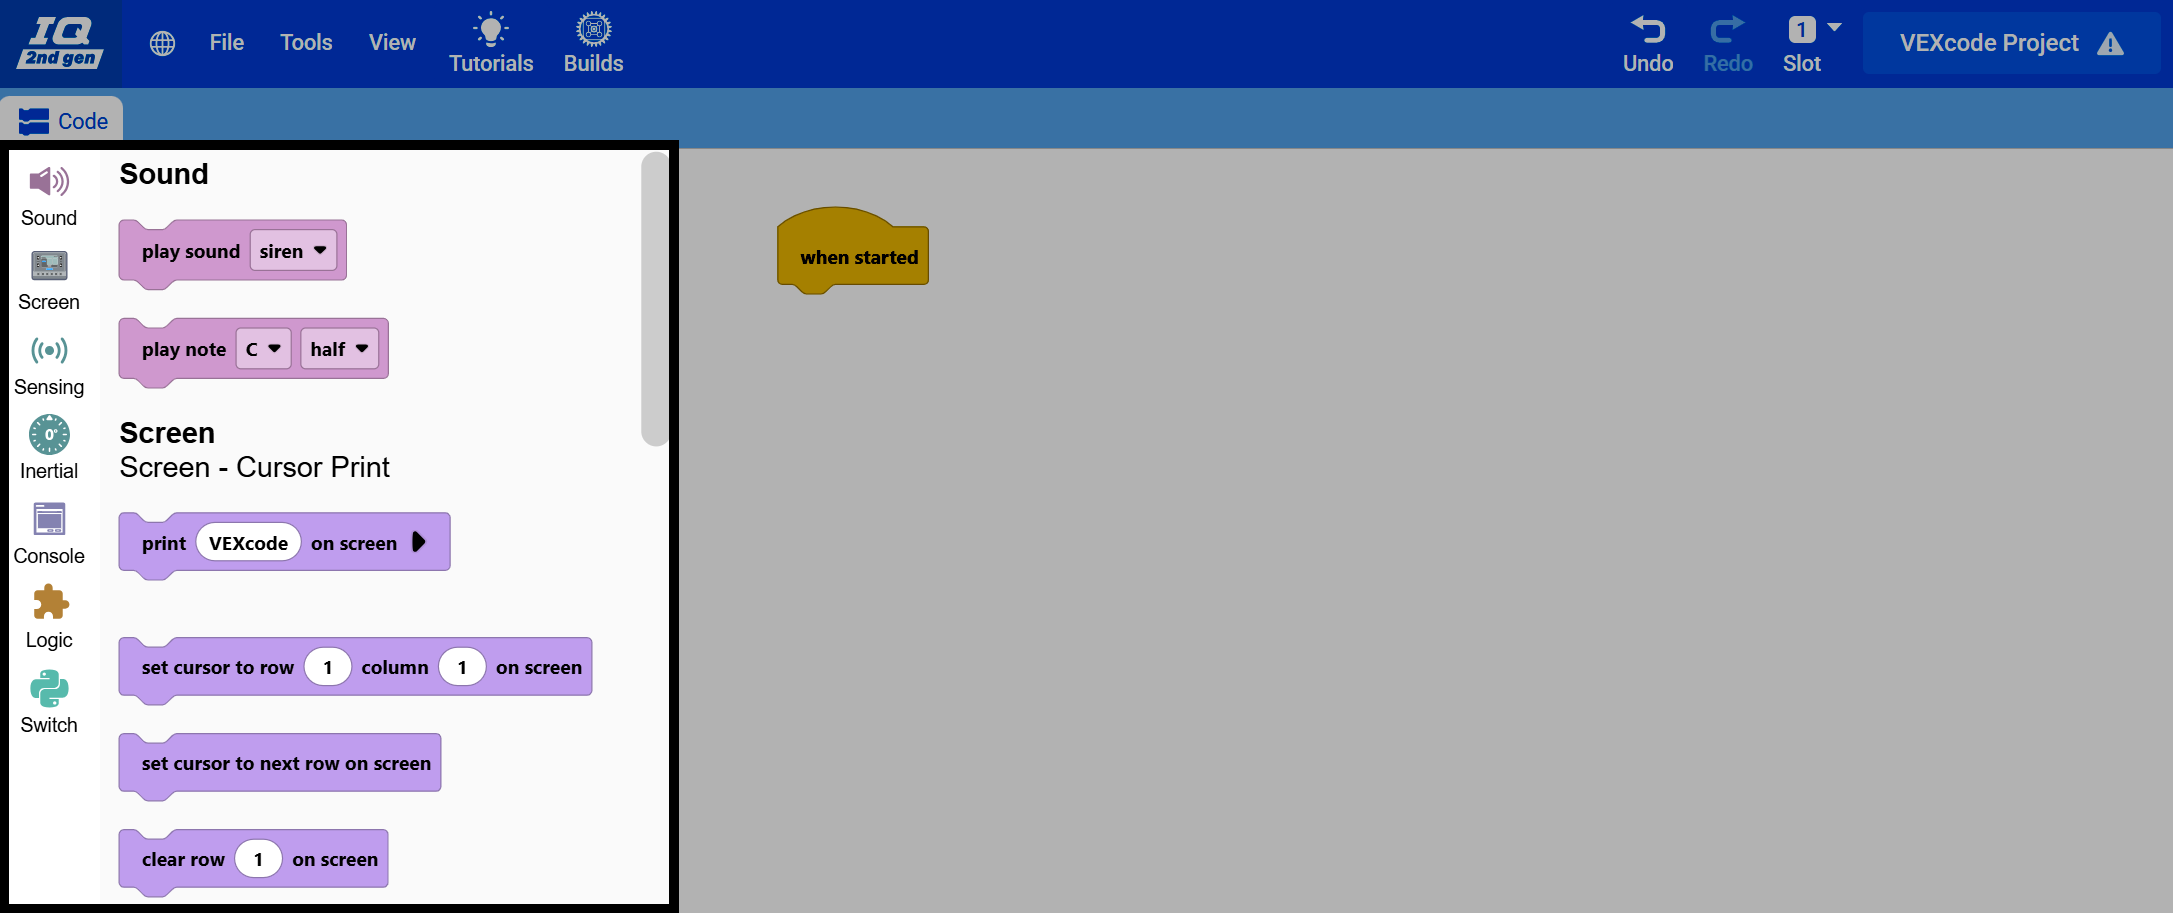
VEXcode IQ(第二代)窗口的屏幕截图,屏幕左侧的模块类别已突出显示,工作区已变暗。

Selecting a category shows you all the blocks in that category, in the toolbox next to it, ready to drag into your project.
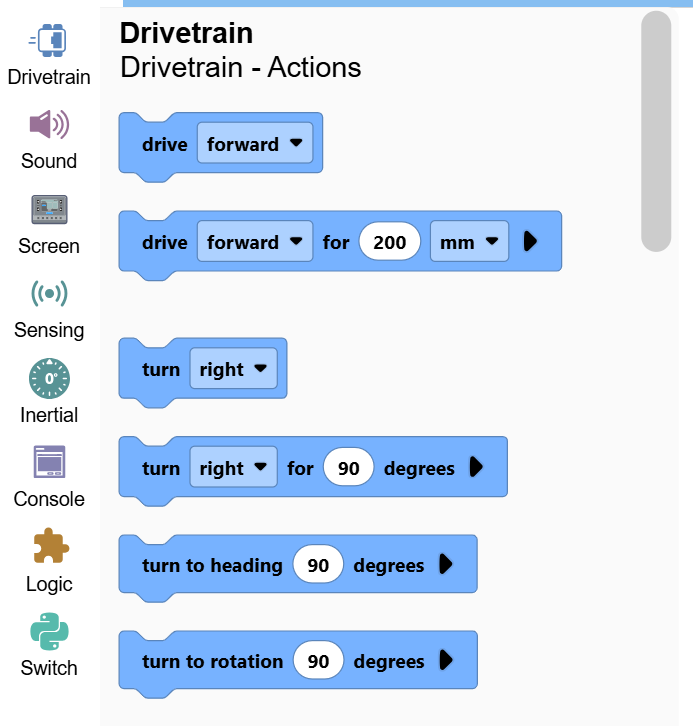
Screenshot of the VEXcode IQ (2nd gen) window, with the toolbox highlighted, showing the Drivetrain category's blocks.

上一页

VEXcode教程

下一页

连接到您的机器人

Innovation First, International

VEX 和 VEX Robotics 是 Innovation First, Inc. 的商标或服务标志 版权所有 ©2026保留所有权利。VEX Robotics, Inc. 是 Innovation First International, Inc. 的子公司。所有其他产品名称/标志均为其各自所有者的财产。专利和/或专利申请中 - innovationfirst.com/patents
网站隐私政策 / 网站使用条款 / Cookie 政策 / 软件隐私政策

访问 VEX Robotics Facebook 页面 访问 VEX Robotics Twitter 页面 访问 VEX Robotics Instagram 页面 访问 VEX Robotics YouTube 页面
VEX API 反馈表

我们重视您的反馈!请使用此表单分享建议、赞美或报告 VEX API 的错误。您的反馈有助于我们完善 VEX API 文档。

如果您遇到技术问题或需要客户支持,请访问 support.vex.com.

  • Send Happy Feedback
  • Send Sad Feedback

注意:当前 URL 将与您的消息共享

通过添加您的电子邮件地址,您同意如果我们对您的反馈有疑问,VEX 可以向您发送电子邮件。
隐私政策 >
请提供您的反馈。 反馈提交成功!
Choose Which VEX IQ Generation to View

VEX IQ (1st gen)

VEX IQ (2nd gen)